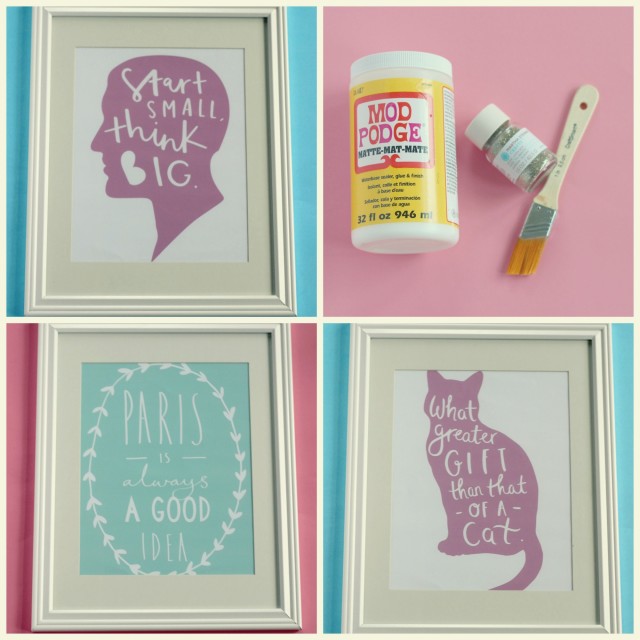
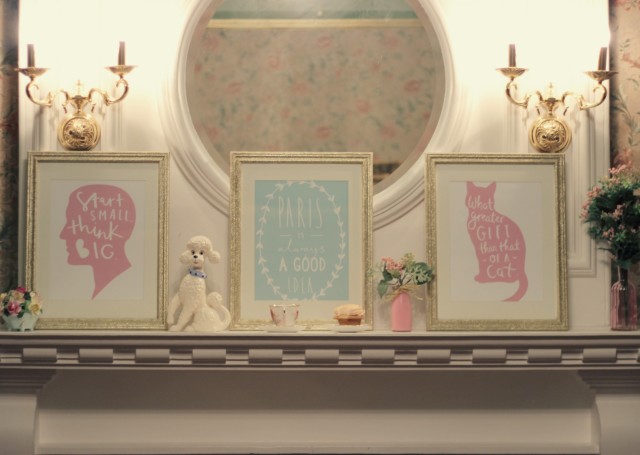
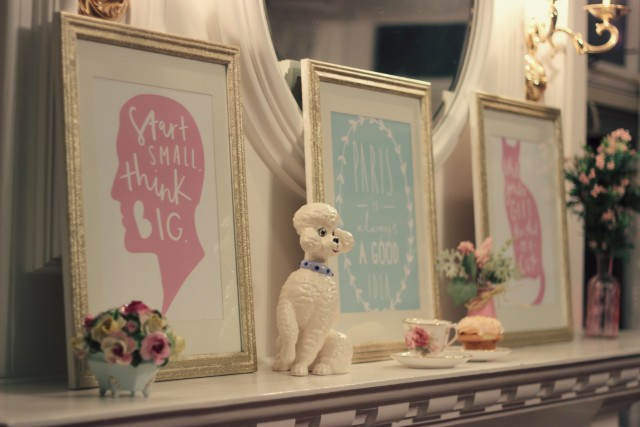
I recently got these cute prints in the mail from Old English Company and wanted to jazz them up with some fun DIY glitter frames. I was browsing on Pinterest and stumbled across an easy DIY for creating your own glitter frame using Mod Podge and Martha Stewart glitter from Michaels Arts & Crafts. Sometimes I get nervous to try something crafty from Pinterest because I am afraid that it will turn into one of those epic Pinterest fails that looks nothing like the pictures.This project was surprisngly easy to create with no major disasters. Mod Podge is seriously a miracle product and now I am trying to think of other items that I want to glitter throughout my house.
Supplies:
- Mod Podge
- Glitter
- Paint Brush
- Picture Frames
Steps:
- Apply a thin layer of Mod Podge to the frame.
- After you apply the Mod Podge slowly sprinkle the frame with the glitter.
- Wait and hour and then repeat the process until you get the desired consistency with the glitter.
- Once the glitter is even apply a final coat of Mod Podge to seal the frame.










Michelle
November 5, 2015 at 5:57 amLove the frames, so cute! I always thrift frames and can’t wait to spruce them up like this, thanks for the DIY! 🙂
xo – Michelle
http://www.borncreativeblog.com
Laura Jane Atelier
November 5, 2015 at 10:08 pmThanks Michelle, I am going to look for some thrift frames this weekend. Let me know how they turn out
xo
Nina
November 5, 2015 at 5:59 amPretty ! Love the frames ! Thanks for sharing Laura !
Nina
xox
http://www.titritmode.com
Laura Jane Atelier
November 5, 2015 at 10:10 pmThanks Nina
xo
EverRose.com
November 5, 2015 at 6:32 amAwesome tutorial! Will definitely have to try this out for myself!
https://EverRose.com
Laura Jane Atelier
November 5, 2015 at 10:11 pmThanks Brittany
xo
Elena Dal Maso
November 5, 2015 at 7:34 amYou did a great job!
Lovely shades these pale pink and blue :)))
xoxo
http://www.bellezzefelici.blogspot.com
Laura Jane Atelier
November 5, 2015 at 10:13 pmThanks Elena
xo
Stacey Louise
November 5, 2015 at 7:51 amLovely post! I am going to try this out myself!
Fix Me In Forty Five – A Beauty & Lifestyle Blog
Blog Lovin’ // Instagram
xx
Laura Jane Atelier
November 5, 2015 at 10:15 pmThanks Stacey
xo
Enrica
November 5, 2015 at 8:46 amreally nice picture frames!
http://www.fashi0n-m0de.blogspot.it
Laura Jane Atelier
November 5, 2015 at 10:17 pmThanks Enrica
xo
Summer
November 5, 2015 at 10:27 amThis is really beautiful and creative. It is nice to see another side of you♥♥
summerdaisy.net
Laura Jane Atelier
November 5, 2015 at 10:19 pmThanks Summer, I am so glad you like it
xo
Anouk
November 5, 2015 at 12:32 pmLove the glittery result! And I really hope that you will make it to Paris someday soon!
http://www.LUXESSED.com
Laura Jane Atelier
November 5, 2015 at 10:21 pmThanks Anouk, I know I talk about going to Paris way too much
xo
Natalia
November 5, 2015 at 12:47 pmSo pretty!! Love your blog, I just found it today. Super cute. <3
Brainchild
Laura Jane Atelier
November 5, 2015 at 10:21 pmAwe Thanks for stopping by Natalia
xo
Nina
November 5, 2015 at 5:24 pmSo cute. Great DIY.
Nina
https://www.ninasstyleblog.com
Laura Jane Atelier
November 5, 2015 at 10:24 pmThanks Nina
xo
Heather Noire
November 5, 2015 at 6:59 pmThis is a really great idea! Thanks for sharing this so creative 🙂 https://www.bauchlefashion.com
Laura Jane Atelier
November 5, 2015 at 10:26 pmThanks so much Heather, I am so glad you like it
xo
Jillian
November 5, 2015 at 7:01 pmSo adorable and chic!
xo, jill
http://www.BornFancy.com
Laura Jane Atelier
November 5, 2015 at 10:27 pmThanks Jill
xo
Rita
November 5, 2015 at 9:56 pmI’m so on board for this DIY! I need a little spice in my life or shall I say….a dash of glitter and a pinch of glam….. ;)! SO creative Laura! Love this DIY! 🙂 Rita @ http://www.CoastWithMe.com
Laura Jane Atelier
November 5, 2015 at 10:50 pmAwe thanks Rita!
xo
Sierra Danielle
November 5, 2015 at 11:46 pmLove this DIY! I’m not very crafty but I think I can do this one!
sierradanielle.com
Laura Jane Atelier
November 7, 2015 at 6:22 pmThanks Sierra, it is super easy
xo
Trang Do
November 5, 2015 at 11:52 pmBeautiful frames!! Love this DIY!!
Xoxo,
Love from http://www.trangscorner.com {a lifestyle, fashion, beauty, and food blog}
Laura Jane Atelier
November 7, 2015 at 6:25 pmThanks Trang
xo
Bekleveer
November 6, 2015 at 12:24 amI like your blog, its really dope.
Do you want to follow each other?
If you want, than follow me, and let me know in comments, so I can follow you back with pleasure.
https://bekleveer.blogspot.com/
xoxo
Laura Jane Atelier
November 7, 2015 at 6:27 pmThanks for stopping by Bekleveer
xo
bri
November 6, 2015 at 1:17 amSuch a lovely post! xo
Love,
Bri
http://www.cityfashiongirl.com
http://www.youtube.com/briannadeg
Laura Jane Atelier
November 7, 2015 at 6:30 pmThanks Bri
xo
Emma Engmark
November 6, 2015 at 1:53 amLovely DIY, such pretty frames.
https://tealattewithstyle.com/
Laura Jane Atelier
November 7, 2015 at 6:39 pmThanks Emma
xo
Missy May
November 6, 2015 at 2:34 amThese are so cute and lovely.
missymayification.blogspot.co.uk
Laura Jane Atelier
November 7, 2015 at 6:42 pmThanks Missy May
xo
Rajwant Kaur Singh
November 8, 2015 at 8:40 amThis is such a lovely DIY! They really make the prints even more darling
What a fabulous idea
What Raj Wants
Monica
November 8, 2015 at 10:06 pmhttps://www.keoughelectricco.com/
Awesome post!
Gabi Valladares
November 9, 2015 at 4:48 amI love this idea! The frames are adorable – and perfect for the holidays!
g.